Your table saw has a “friend.” It’s a fence. Usually, table saws, from the moment you buy them, have been equipped with a fence. In most cases, however, these fences are not of sufficient quality, making them unreliable for some types of woodworking.
If you ignore this, you might get into serious trouble in the middle of the mini-project you are going to work on. In any case, this problem can be solved with a simple DIY. Within an hour, you can prepare a table saw fence to suit your needs.
Even with some adjustments (to your budget), you can make the best table saw for money. There are many types of them, universal table saw fence, vega table saw fence, t-track table saw fence, t-square table saw fence, etc., but of course not all of them are suitable for your projects.
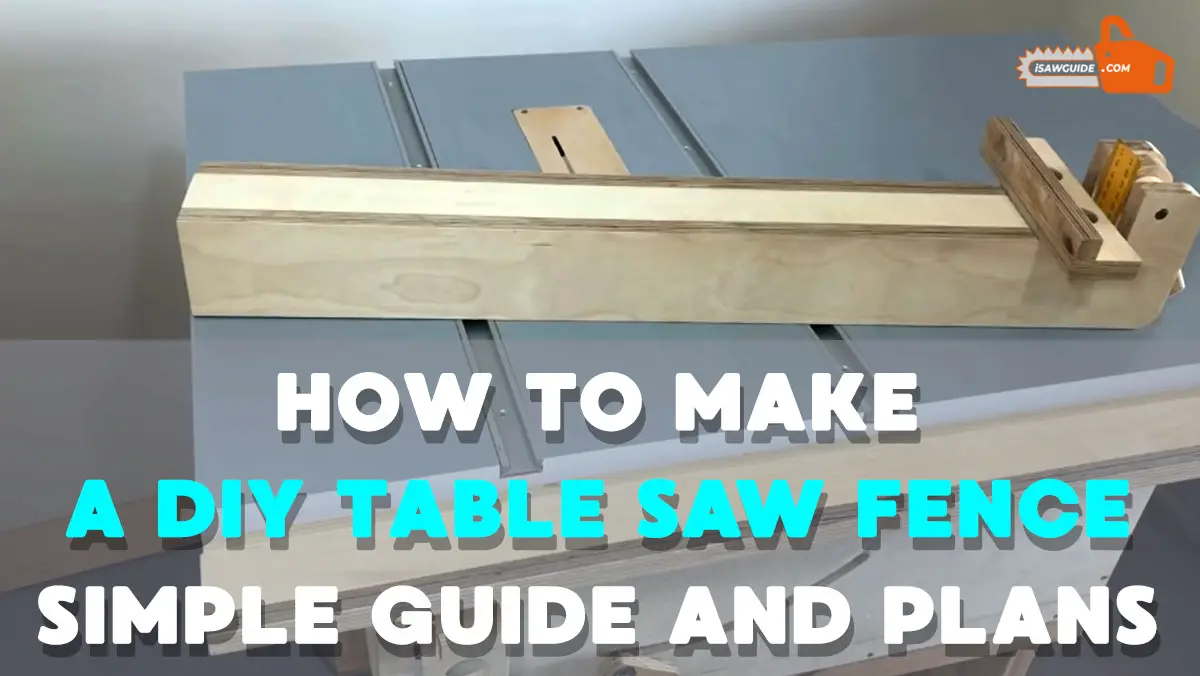
This article will talk about how to make a DIY table saw fence. Keep reading this table saw fence guide!
What Is A Table Saw Fence?

First of all, you have to understand what fence is. The fence, for example, a metal DIY table saw fence, is an important part of carpentry equipment that is used to hold or secure workpieces during the working process.
Fences are usually made of wood, metal, and even plastic. Most of the fences are in a static position but a small part can be moved.
And A Table Saw?
")
One of the essential power tools in the field of carpentry are saws. Suitable for cutting and polishing not only wood but also other soft materials such as plastic or metal sheets of aluminum or brass, the saws offer a wide selection of models that cover all the needs of the professional or the hobbyist.
Thus, for example, among the portable models, we can have circular saws, saber, jigsaws, and miter saws, among others.
This useful tool, whose first prototypes were developed more than two centuries ago, essentially consists of a circular cutting disc protruding from the center of a horizontal table that is part of the machine.
Hence its basic name “table saw” because in effect it incorporates a table. The saw is in a fixed position and the operator pushes the workpieces through the disc to make cuts much faster and more accurately than manual circular saws.
These Cuts Can Be:
- Straight in the direction of the wood grain.
- Cross through the grain of the wood.
- Miter and bevel, i.e. at an angle.
- Then a table saw fence is a fence that functions to secure the workpiece when the table saw is operating on the workpiece.
- Ready to make one? No need to depend on the best aftermarket table saw fence system!
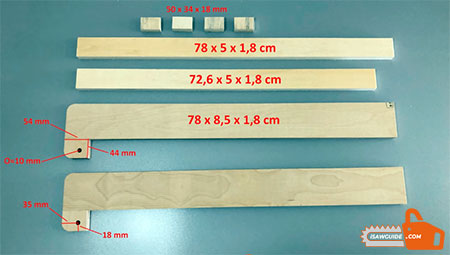
- There are materials you need to prepare (in this case we will make an aluminum table fence).
- Rectangular-shaped aluminum bar. It is the best material for the table saw fence.
- Several wood screws (50mm).
- Several pieces of square wood measuring 2×2.5 cm.
- 2×7 cm wooden planks for the fence.
- Several plywood blades.
- The carriage bolt.
The Tools You Will Need Are:
Here Are the Step By Step Guide On How to Make a DIY Table Saw Fence
Make two passes on the aluminum slats with a groove size of 9 mm. The two passes are perfect for the slide bolt. Don’t forget to drill to make 5 holes to house the screws.
Then You Have To Install The Rails
Use wooden planks to make sure the rails are flush with the tabletop. Mark the holes and drill to the maximum depth. Use 50 mm screws to secure it.
Create A Sliding Mechanism
Add a square piece of wood. Do not forget about the eyeballs and mark the center of the grooves. Drill three holes and line up the square piece of wood with the places marked with the drill bit. Drill the center hole completely and drill the side hole only half a depth.
Assemble
Hammer two T nuts in the side holes and dump a few millimeters of wood to offset the back of the T nut. Glue, clamp, and screw the two halves to one solid unit.
Select The Carriage Bolts
Cart bolts are needed for sliders as they have round bolt heads that will come in handy for grinding two sides.
Make The Fence
Once you’ve made sure the aluminum fence is the right size, it’s time to make the stands (on both sides) with strips of wood.
Frequently Asked Questions(FAQ):
Q. What Side Of The Table Saw Should The Fence Be On?
A. On the right side (on the right side of the saw blade). Most of the work requires the position of the saw blade tilted. Since most modern saws tilt the blade to the left, if you position the fence on the left then you will cause a jam. As simple as that.
Q. Table Saw Fence Isn’t Square?
A. If the fence is not perpendicular to the table? In many cases, it will create problems with work precision. Here are the three best solutions for you:
- You must build a new saw fence (as described in this article).
- Cut the workpiece with a work angle in accordance with the angle of inclination of the fence.
- You may have to install some sort of additional fence with the top edge made to join the table fence, to support unnecessary shock during work.
Q. How To Fix A Table Saw Fence?
A. Usually, the damage that occurs lies on the side that is in contact with the workpiece. The damage that occurs is usually a kind of depressions in accordance with the shape of the workpiece and how it is done.
For example, your fence is an aluminum fence, the way to fix this is to apply a kind of artificial mayonnaise made of G / 5 Five-Minute Adhesive thickened by 403 Microfiber.
Apply the mayonnaise to the “cuts” on the fence and smooth it with a kind of wooden slats. Wait for it to dry then your fence will return to normal.
Q. How Do I Upgrade My Table Saw Fence?
A. The best way for a cheap table saw fence upgrade is to increase the width of the fence which will increase the stability of the woodworking process. You can also add a three-point front and rear locking mechanism, so the working accuracy will be greatly improved.
Q. How Do You Square A Table Saw Fence?
- Make sure your saw blade and miter slots are parallel to each other.
- Use your finger as a gauge and detector to feel along the miter gap in the fence.
- Loosen one of the screws and adjust the position of the fence and re-screw.
Q. How To Keep Wood Against The Fence On The Table Saw?
A. You will need to use a feather plank to hold the wood in the fence for a straight cut. Why a feather board? Because it has a kind of “wooden spokes” which tends to hold the wood tighter.
Conclusion
Making a DIY table saw fence doesn’t seem too complicated. What you need is patience to make any necessary adjustments, for example making sure the fence is perpendicular to the table, loosening one of the screws to move the fence position, and so on.
Hopefully, by reading this article you will have an idea of how to make a table saw fence that will help your next projects. By doing the steps, you will understand the principles of making a table saw modifications. Thanks for reading and have a nice try!
You May Also Interested to Read:
1. How to Build a Table Saw Workstation – 9 Steps DIY Guide (2021)
2. How to Sharpen a Table Saw Blade Accurately – A Hands-on DIY Guide
3. How to Cut an Angle on a Table Saw: A Hands-On Guide (2021)
4. How To Cut Plexiglass On A Table Saw – Learn With Different Saws
To Learn More About Woodworking and Carpentry Visit at iSaw Guide Home.
Table of Contents