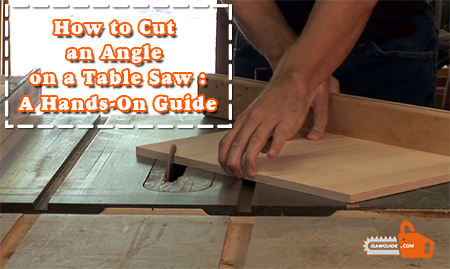
Are you stressing on how to cut an angle on a table saw? Well, stress no more. A table saw is a tool used for cutting wood in different ways. Edges cut by the use of a table are usually accurate.
Before carrying out the process, you need to carry out some preparations. This helps you to obtain good results after the cut. Developments include setting the saw blade to a height you are comfortable with when handling it.
However, when cutting, ensure you follow the steps correctly to avoid causing accidents. It is more comfortable working on a table saw than other saws. Follow these tips to help you achieve accurate angle cuts with a table saw.
Prepare The Wood And Saw Blade
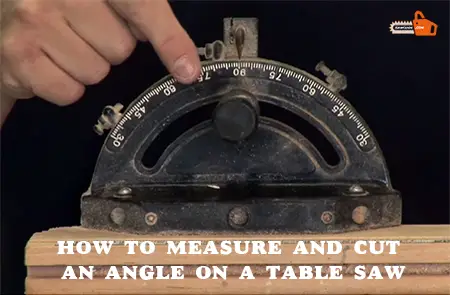
Before experimenting, you need to collect all the required equipment. It saves time and energy. Here I will teach you how to measure and cut an angle on a table saw. Ensure that the saw blade is entirely off to prevent accidents.
It should be done before and after cutting the wood. Identify the angle that you cut. There are various types of aspects.
It includes a 45degree angle, 90-degree angle, among others. You can use a measuring ruler, a sharp pencil, or other necessary equipment.
Use a sharp pencil to draw across the board.
Mark some points on the board to show the start and end of the cut. Then join the points together. The use of a ruler can do it. Make sure that the wood is well adjusted to avoid errors. A table saw blade sets for 0.32 cm.
It is suitable for straight cuts. Table saws can either raise or low. It depends on the cuts and angles one is interested in making. To obtain a good reduction, increase the height as its blades teeth are nearer the wood.
However, one may raise the height according to their wishes.
Ensuring The Wood Is At The Right Angle
 10-Inch Table Saw, 32-1/2-Inch Rip Capacity")
Here I will teach you how to cut wood at an angle on a table saw. You are required to have some instruments, such as the drafting triangle.
It can use for making angled cut as it has flat edges suitable for its work. It works well for crosscuts.
In the case of a lack of a drafting triangle, they can use a framing square.
Before carrying out this procedure, ensure that your table saw has enough space. Use a tape measure for measuring.
When you are learning how to cut wood at an angle lengthwise, a table saw taper jig for long cuts recommended.
The flat edges of a drafting triangle are essential when making an angle.
When cutting, a miter gauge is vital to ensure that the boards maintain a perfect perspective.
However, if you are interested in how to make bevel cuts on a table saw, use a taper jig as they are the best.
They prevent one’s fingers from getting close to the blade. It is also a way of how to use a taper jig on a table saw.
A drafting triangle is the best to work with. It has one diagonal edge and two other flat edges.
The two flat edges make work easier when setting an angle.
Setting An Angle
Ensure that the wood and drafting triangle press together. You can then move the gauge to adjust to any angle. Move the gauge in the left or right direction.
When you obtain the required angle, rotate its handle clockwise so that it stays at that angle.
Setting an angle is a bit difficult as compared to the others. One has to keep turning the miter gauge to get an excellent outcome.
When cutting a 90 degrees angle, there is no need for adjustments.
You just need to place your miter gauge at one end and place one edge of the drafting triangle against the saw blade.
Making Of Bevel Cuts Using Taper Jigs
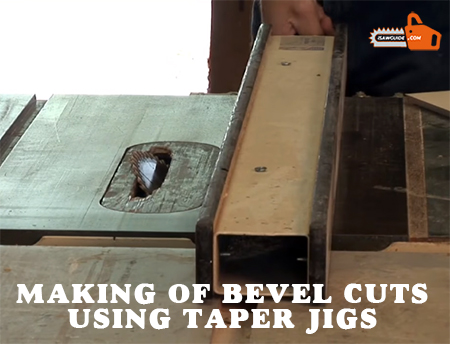
There are different types of taper jigs. Some are easy to use or work with, while others are difficult. It is because of the different ways the jigs are in.
To enhance your work efficiently, go for a wood that has a good base and clamp. It prevents you from injuries as your hands don’t get too close to the blade.
However, when choosing a taper jig, ensure it’s of good quality. It will prevent you from frequent purchasing of it, therefore, saves money. They also enhance accurate results.
Mark and measure the endpoints. Join the marks to obtain a clear straight line. Make sure that the tapper jig is open. It ensures that the wood is at a right and accurate angle.
Take measurements from the jig to the ends of the cut. For accuracy, the distance between them should be equal. Work on one piece at a time.
It, in return, will help you determine how well you will make the right cut. Make sure that you make the perfect right angle before you cut.
Additionally, it is good to ensure that there are no spaces between the cut edges.
Consider Control Over The Table Saw
")
Make sure that you can control the wood. Table saws contain a feature known as a fence. It is a piece of the metal bar. The fence allows the miter gauge to make cuts. It also lays flat when cutting thin materials.
It leads to good results. People choose table saws according to the amount of work they intend to carry out in a day. An automatic fence is a right choice for those with lots of tasks in a day.
Being in control of the wood will help you have more power and thus make a perfect cut. Ensure that the wood you are using is at least four-inch wide.
Nevertheless, if you lack a fence, there is another way of how to deal with the issue. Put a piece of wood at the back of the tapper jig. Always ensure that the attachment well set.
It helps gives you a reference angle that helps you work well when aligning the wood against the blade.
In most cases, such products, such as the jig attachment can come as accessories in any home store.
Putting On Of Protective Clothing

It is essential that before carrying out any experiment, one should put on protective equipment. This equipment may include overalls, goggles, face mask, and earplugs.
This equipment has different purposes. They are all vital as they protect you from various things.
Overalls, help to prevent one from dirtying your regular clothes. They also prevent clothes from getting torn by the machines. Face masks prevent you from inhaling the dust.
Earplugs avoid one from the noise produced by the devices, which can lead to ear problems.
Maintenance Of The Working Area
A workplace is a crucial place. A workplace should be separate from other regions. Also, ensure that your place is clean and well ventilated.
A well-ventilated room has enough fresh air for breathing, therefore, preventing suffocation.
Avoid children playing in your workplace. Children lack the knowledge of how to operate the machines.
Therefore they may end up getting hurt by some of the tools. Avoid pets from your working place.
Ensure That The Machines Are In A Good State
Before experimenting, test the devices to make sure that they are working. Do not use the actual materials for the experiment. Use scraps of wood.
The saw blades should cut well through the piece of wood. If you note any fault, repair should be as fast as possible.
Set The Blade At A Perfect Angle
Ensure that the blade is in good position firmly fixed to the pole on the table. It will also enhance the easy installation of the fence. It allows you to save on time and energy.
Install The Fence Correctly
This procedure varies according to the type of fence and the type of saw. However, it is essential to follow the manufacturer’s instructions during installation.
This ensures that the fence in a correct position to allow smooth cuts on the board. This dramatically makes the table sawing an easy process.
Furthermore, it does not require a lot of skills to perform.
Consider The Position Of The Fence
Place the fence in any location according to one’s preferences. Put the fence in place by fixing it using your hands. Most of them have a set of wing nuts.
Cutting Of Different Angles
When cutting a 45-degree angle with a table saw, ensure that you cut two separate pieces of the same size.
Then fit the pieces together. In case they don’t rhyme in size, check on your miter gauge and repeat the process.
You can also learn how to cut an angle over 45 degrees on a table saw.
These are tested differently from others. The board cuts should appear as smooth as possible.
Carrying Out A Bevel Cut Procedure
Bevel cuts are a little bit difficult to be done accurately. These are cuts done on the sides of a board.
Follow the process on how to make bevel cuts to make a cross along the width of the board.
Ensure that your fingers don’t get close to the blades.
Get an alternative way of pushing the wood.To obtain good results, ensure that the wood is tight to the fence.
Watch Out For The Position Of Wood On The Fence
You are supposed to hold the wood from a slightly far distance from the blade. Hold the wood on the side that is not in use.
Control the wood as during its cut out. Any of your hands is necessary to hold the wood. You can use the hand that you wish.
Either the right hand or the left side. As long as it’s the one you are comfortable with.
Stand At The Position When Cutting Wood
Stand behind the miter gauge and not the saw blade. It prevents you from kickback. What is Kickback?
Kickback is a situation whereby the wood that in the process suddenly moves towards the back at a very high speed.
It may lead to injuries. Kickback can also lead to trauma. A splitter is essential to prevent kickback.
The splitter prevents wood from moving into the blade.
Using a riving knife is also a method of preventing kickback.
It prevents wood from being caught at the back of the saw in case it moves away.
Cutting Of The Wood By The Saw
Here, the push of the wood forward carefully to obtain a good cut. Use one hand to hold the fence and board together while the other on the miter gauges handle.
In most cases, use the side you are used to holding the fence. Stop the whole wood immediately is cut. Push the wood slowly to avoid kickback.
Be careful when pushing the wood. The slower you push the wood, the more accurate the results become.
Avoid your hand from getting too close to the blade. Use a wooden stick to push it to the blade.
Check On The Final Results
After the cut, pull the fence, miter gauge, and even the piece of wood back. Switch off the saw and ensure it’s completely off. After this, you can now remove the wood.
The wood should be of the correct angle as desired.it should also be smooth. If the final results don’t satisfy you, you may be required to recut.
Conclusion
Cutting of angles on a table saw needs a lot of practice for you to be perfect. Follow all the instructions carefully. If instructions are well followed, accidents and injuries will therefore reduce.
Always put on protective clothing before any experiment. Turn off the saw blade every time it’s not in use. Ensure that your hands are far from it when in use.
Cutting angles is more manageable when done on shorter pieces of wood; therefore, make the long pieces of wood short. Shorter boards are at low risk of encountering kickbacks.
Therefore, Using a table saw for cutting angles is just as simple as using the other methods.
Other Useful Articles:
Top 7 Best Rated Pole Saw Reviews
Table of Contents