Are you curious to know how to make a homemade portable miter saw table station? If yes, welcome.
No one knows the necessity of a miter saw table station better than a woodworker. It doesn’t matter if you are a professional woodworker or hobbyist woodworker; you must need a miter saw table station as miter saw became a common tool in woodworking station. If you want to make your woodworking precise and productive, then the miter saw table station is a lifeline for you.
If you search for the best miter saw station, you may find them, but they cost a huge amount of money. And the more important thing is they are not always satisfactory. That’s why the homemade miter saw table station comes into the game.
Here in this article, I came up with a step-by-step guide for making a space-saving miter saw station. Though there are many miter saw station ideas, but I come up with a unique one. If you follow this step-by-step guide on making miter saw table station, you will have your own miter saw table station.
So, let’s start.
Required Necessary Tools To Get Started
Arrange the tools needed for this DIY project before you begin. To save your time and frustration. Let’s know what are the necessary elements required for this project.
- Miter saw
- Tape measure
- Socket/ratchet set
- Farming square
- Cordless drill
- Clamps
- Drill bit set
- Safety equipment
- Level
Materials Needed For Making Miter Saw Station
The quality of this ultimate miter saw station depends on materials. That’s why you should choose quality materials. Here are some materials you should collect before start making miter saw station which are;
- One 4′ x 8′ sheet of 3/8″ BC plywood for the base, top, and back
- Two 8′-long 2x4s for bottom runners
- One 8′-long 1x6s for dividers
- Two 6′-long 1x4s for the fence
- One small box of 1-1/4″ screws
- One small box of 1-5/8″ screws
Steps By Steps Guide On How To Make A Portable Miter Saw Table Station
If you follow this article from the beginning, I assume that you have collected all the tools and materials. It’s better to double-check the required tools and materials list. It will save time and make the process more productive if you have all the tools and materials on your hand.
So, without any more delay, let’s begin making your miter saw station. You will be able to use this miter saw station also as a sliding miter saw station.
Step One: Collecting Important Stuff For Miter Saw Station
So, here we come in our first step for making a saw station. At first, we will buy needed materials which are a must for making miter saw table station. At first, you will need to buy hanger bolts, make sure that it is matching with wing nuts. Moreover, wing nuts should be the size of the holes for a snug fit.
To get the right bolt size, measure table height and add 2-1/2 inches more. When you’re done with getting the right bolts’ size, move to a shop and buy the bolt and other materials, which I mentioned in the materials list.
Step Two: Measuring The Deck Of Miter Saw
Now, we are going to measure the miter saw’s deck. You should measure it carefully because it is very critical. The height of the table’s infeed and outfeed should be equal to deck height. It is needed for seamless support. For better preciseness, you should use a marking gauge.
Start measuring from the deck’s top to the down of the flat plane surface. It would be better for precise measurement if you consider a small square combination until you change it.
Step Three: Marking Plywood
How can you make precise cuts? Of course, through marking. It is a must precondition for making any cut. You have to mark plywood for every part of a mitre saw. For better marking visibility, you should use good marking. It helps to minimize error while cutting.
Marking Notches
In this section, we will mark notches of two side pieces. We will mark each side of these pieces. For accurate measurement of notches depth, you should use the same square measurement that I recommend in the second step. Notches width would be the same as the width of the miter saw bevel’s swing and another six inches plus.
Step Four: Cut Different Parts Of A Miter Saw
You can start cutting plywood at 15-5/8 inch wide for the bottom and 16 inches wide for the top. For better cutting performance, you can use a sidling compound miter saw. If there is any little error, you shouldn’t worry about it. It won’t have too much effect on the project.
For dividers, you will cut one 1x6s to six 15-5/8-inch pieces. After that, measurement them for width. Cut one of the dividers, then place it next to the saw. Measure its height with a straightedge which is resting on the saw table prior to cutting another five.
Step Five: Assembling The Table Of The Miter Saw
Everything is ready now; it is time to start assembling the miter saw table. We will start assembling the table by laying down dividers. For the table’s top, make sure that its length is 22 inches and it is situated on the right side of the saw. After that, measure the miter saw bay by assessing your miter saw.
To make sure that your plan bay is wide enough to clear all moving parts of the saw, move the saw left and right. Whatever remains will be the top’s left side. On the left side, give space between dividers evenly. Join the dividers with screws to the base and overturn assembly. Then tie the base to the 2×4 runners with screws.
At this point, we will measure the final miter saw table height without the table’s top. Then we will cut back pieces so that they become fit. After that, cut them to their length. Now, screw the table’s top and back to the dividers.
Step Six: Mounting The Miter Saw On The Table
Position the saw at the middle of the bay and clamp it in its place. Now use a drill bit to make a 1/8-inch-deep hole to mark the position of the hanger bolt. Keep in mind that its diameter is the same as the mounting hole of the saw.
After that, remove the miter saw. Then make pilot holes and thrust into hanger bolts. While buying hanger bolts, keep in mind that their size is the same as the mounting holes.
To thrust into hanger bolts, tighten two nuts in accordance with one against another, and Ensure that their position is at the machine threads’ top. It is time to lock the saw in its place through wing nuts by dropping the saw over bolts.
Step Seven: Building Fence And Mounting It On The Table
For making the fence, cut two 1x4s, make sure that their length is the same as the top’s left. Moreover, for cutting four triangle braces, make use of waste. Now, tie two 1x4s together with screws. After that, make sure to have even space between braces, then tie them with each 1x4s with screws.
Now make alignment between the fence and miter saw fence in accordance with the straight line. Then tie the fence with every divider through 1-5/8-inches screws.
Frequently Asked Questions
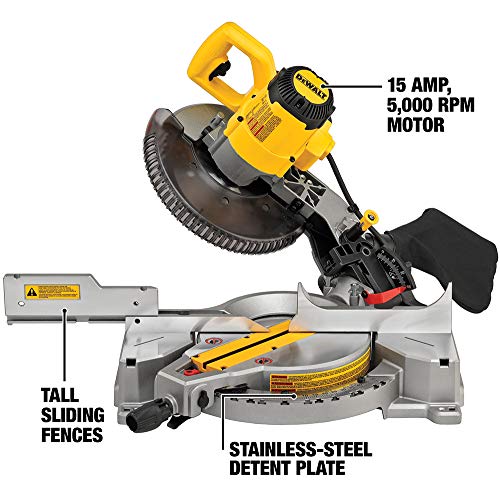
Q. What Is The Best Miter Saw For Making A Station?
A.When it comes to the question of best miter saw, it is really difficult to answer. There is a countless miter saw available on the market, and new ones are coming every day. But there is a miter saw which is best if you consider its feature and performance, and it is DEWALT DWS779 12.
Q. What Is A Miter Saw Used For?
A. Miter saw is the must-have tool for every woodworker. It can make different types of cuts, such as angle cuts, straight cuts, and many more. Even this day’s miter saw known as the all-in-one wood cutting tool. Furthermore, it replaces some woodworking tools, especially through double bevel sliding compound miter saw.
Q. Why Do You Need A Miter Saw Station?
A. Miter saw has become the number one ready-to-go tool for woodworkers since the introduction of double bevel sliding compound miter saw. Miter saw can’t offer its full capability without a station. Miter saw station is needed for cutting wood fast and accurately. Moreover, it also comes in handy for cutting big pieces.
Q. How Wide Should A Miter Saw Station Be?
A. It is a very important question, if you are making a miter saw station for yourself. When it comes to the miter saw station-wide, its measurement is consisting of two sides one is the left side, and another one is the right side. The left side measurement should be 96″L x 24″D x 36″H and right-side measurement should be 48″L x 24″D x 36″H.
Q. How High Should A Miter Saw Table Be?
A. When you’re building a miter saw table, it is the most important fact. You should keep in mind that the table base should have accurate deepness so that it can hold the saw firmly. For getting more space, you can set the height to 18 inches. Actually, it is up to you as it depends on your need.
Final Thoughts
In this article on how to make a homemade portable miter saw table station, I discussed step by step process for making a miter saw table station. I talked about required materials, necessary tools for making a miter saw table station.
Moreover, I also talked about the making process, such as buying materials, measuring the saw’s deck, marking plywood, cutting different parts, assembling miter saw table, mounting saw on the table, and building fence and mounting it on the table.
If making your own miter saw table was impossible for you after reading these steps, you will be able to make your own saw table easily.
Thanks.
You May Also Interested to Read:
1. How to Change the Blade on a Miter Saw: 4 Quick Steps Guide (2021)
2. How to Unlock a Miter Saw – Hands-on Step by Step Guide
3. How to Cut Baseboard Inside-Outside Corners with Miter Saw (2021)
4. How to Cut Laminate Flooring Lengthwise with a Miter Saw – Hands-on Guide
To Learn More About Woodworking and Carpentry Visit at iSaw Guide Home.
Table of Contents
I was looking for ways to cut pavers on the internet. The tick then I saw the article you wrote. Very nicely described How to Cut Pavers with a Wet Saw. And 5 easy methods. Your writing format is very beautiful. I found out a lot of new information after your article. At first, Pavers seemed a lot harder to me. However, after this article, I realized that it is a very simple task. Everyone who thinks Pavers cut Jamela’s work should read this article. Thank you so much for sharing the article in such a beautiful way.
Thanks, Sham. We are very happy to know that you have found our article useful.