A quarter round is a thin, rounded molding typically ¼ inch thick and about ½ inch wide. It covers the joint where the wall and floor meet and can also be used to add a decorative touch to your project.
Quarter rounds are available in wood and vinyl and come in various colors and styles to match your décor. Quarter round is easy to install and can be cut to fit any size edge. It’s a great way to add a finishing touch to your décor.
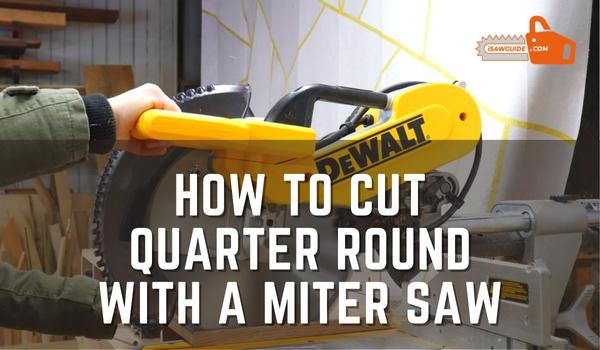
Cutting quarter rounds can be daunting, but with the right tools and knowledge, it can be done quickly and easily. This article will discuss how to cut quarter round with a miter saw and a few tips to make the process easier.
Types of Miter Saws
Miter saws are power tools used to make accurate, clean cuts in wood at various angles. There are three main miter saws- manual, compound, and sliding.
Manual miter saws are the simplest type- a blade is mounted on a pivot point, and the user moves the saw around the workpiece to cut.
Compound miter saws add a motor that moves the blade up and down as well as left and right, allowing for more intricate cuts.
Sliding miter saws have an additional arm that allows the blade to move forward and back, making even wider cuts.
Miter saws are commonly used in construction and carpentry for trimming, framing, and other precise cuts.
Why Use Quarter Round?
One of the most asked questions by do-it-yourselfers is why to use quarter round. After all, why can’t you use it as is if you have a piece of Trim that’s the same width as your flooring and cut it to the right length?
The answer has to do with how Trim and flooring are installed. Flooring is usually installed so that it’s flush with the walls around the room.
On the other hand, the Trim is generally installed so that there’s a small space between it and the flooring – about 1/4 inch. This space is what quarter round is designed to fill.
By installing quarter round, you create a smooth transition from the flooring to the Trim. This not only looks super great, but it also helps protect both the Trim and the flooring from damage.
Tips For Measuring Your Quarter Round
When measuring your quarter round, there are a few things you need to take into account. This guide will help you measure correctly and ensure your quarter round looks excellent when installed.
First, measure the height of the bullnose on the wall. Then, measure the width of the bullnose on the floor. Be sure to add a little extra for cutting and installation. Once you have your measurements, it’s time to purchase your quarter round.
When you get your quarter round the home, cut it to size using a miter or circular saw. If you’re uncomfortable using a saw, have a professional do it. Finally, install your quarter round using construction adhesive and finish nails.
Cutting The Quarter Round : How To Cut Quarter Round With A Miter Saw
When working on a wood trim project, it is essential to use the right tools. A miter saw is perfect for cutting a quarter round. Measuring and marking the Trim before cutting is necessary to get the most accurate cuts.
There are many ways to cut quarter round, but using a miter saw is the most common. To do this, you’ll need to measure and mark where you want to cut the quarter round.
Be precise because even a tiny mistake can cause your piece to be too short or too long. Once you’ve made your markings, set your saw blade at a 45-degree angle and cut along the line.
If you’re new to using a miter saw, it might be helpful to practice on some scrap wood before cutting your actual quarter round.
Different Types of Quarter-Round Cuts You Can Make with a Miter Saw
A few different types of cuts can be made with a miter saw. The first type of cut is a basic quarter-round cut. This is the most general type of cut and is used to create a round edge on a piece of wood.
The second type of cut is a beveled quarter-round cut. This type of cut is used to create a beveled edge on a piece of wood. The third type of cut is a cove quarter-round cut.
This type of cut creates a cove edge on a piece of wood. The fourth type of cut is an inverted cove quarter-round cut. This cut is used to create an inverted cove edge on a piece of wood.
What Angle Do You Cut Quarter Round With A Miter Saw?
If you’re a beginner do-it-yourselfer, you’ve probably tackled pretty simple projects like hanging a few pictures or putting up some new shelving.
But when it comes to more challenging tasks like trimming out a room or installing baseboards, you might wonder what angle you need to cut the quarter round with a miter saw.
Here’s an easy and quick handy guide to help you make those cuts like a pro: When cutting quarter round, the angle you need to cut will depend on the application.
For instance, if you’re installing a quarter round to cover the gap between the baseboard and the floor, you’ll want to cut the molding at a 45-degree angle.
However, if you’re using a quarter round to transition between two different flooring surfaces, you’ll need to cut the molding at a shallower angle, so it lays flat against both surfaces.
In this case, a 22.5-degree cut should do the trick. Use a sharp blade in your Miter saw, no matter your cutting angle. A dull blade will make it more challenging to get a clean, precise cut.
Ask a sales associate at your local home improvement store for guidance if you’re unsure which angle to cut. They can help you select the right quarter round for your project and ensure you make the correct cuts.
Tips And Tricks For Cutting The Quarter Round With A Miter Saw
Anyone who has tried cutting a piece of the quarter round with a miter saw knows it can be tricky. The primary key to getting the job done is using the proper technique.
Here are some tips and tricks to help you get the job done quickly and efficiently.
First, ensure your miter saw is set to the correct angle. If unsure what the right angle is, check your saw’s manual or online instructions.
Next, place the quarter round flat on the saw table, with one end of the piece against the fence.
Ensure that the end of the quarter round is flush against the wall, and then secure it with clamps or a vice grip.
Before you start cutting, adjust the blade height so that it is slightly higher than the thickness of the quarter round.
Frequently Asked Questions (FAQs):
Q. How Do You Handle Quarter Rounds With A Miter Saw?
A. There are a few ways to take quarter rounds with a miter saw. One way is to cut at the angle you need and then use a chisel or router to round over the edge.
Another way is to make two 45-degree cuts, one on either side of the quarter round, and then you can use a chisel or router to round over the edge.
Q. How Do You Cut A 45-inch Quarter Round With A Miter Saw?
A. When cutting a 45-inch quarter round using a miter saw, you need to measure and mark the cut line on the round. Next, you must set your saw’s blade angle to 45 degrees.
Then, hold the round against the saw’s fence and cut along the marked line. Finally, use a sanding block to smooth any rough edges.
Q. What Tool Is Used To Cut Quarter Rounds?
A. A quarter round is a molding that has a rounded profile and is used to cover the joint between a floor and a wall. It can also cover the edge of a floor or wall panel.
Quarter rounds are typically made from wood, but they can also be made from plastic or metal.
Q. How Do You Miter A Quadrant?
A. In math, a quadrant is a fourth of a circle. To Miter the quadrant, you need to use a compass and ruler:
- Draw a circle with the compass.
- Use the ruler to draw two lines from the center of the circle to the edge of the circle.
- Cut along these lines with scissors to create your quadrant!
Q. How Do You Determine The Trim Angle?
A. The trim angle is where the blade of a saw meets the board being cut. It is essential to set the trim angle correctly to achieve a clean and accurate cut.
Depending on the saw you are using, there are a few different ways to determine the trim angle.
Q. How Do You Cut Quarter Round For A 90-degree Corner?
A. There are many ways to cut quarter round for a 90-degree corner. The first method is to use a miter saw. You can set the saw to 45 degrees and cut the quarter round.
Then, place the saw to 90 degrees and cut again. This will give you two pieces of quarter round that fit together perfectly in a 90-degree corner.
The second method is to use a coping saw. Cut the quarter round so that it is slightly longer than the length of the corner.
Then, score along with the size of the quarter round with the coping saw until it breaks off cleanly at the score line.
This will give you two pieces of quarter round that fit together perfectly in a 90-degree corner.
Q. Should I Cope Or Miter Inside Corners?
A. When it comes time to finish your drywall project, you may wonder if you should cope or miter the inside corners. To help you make a decision here is some information on both methods.
Coping is a technique that involves cutting and fitting the drywall so that it overlaps the edge of the framing member. This method is often used when there are electrical boxes or other obstructions.
Mitering, or cutting at a 45-degree angle, is another option that can be used for inside corners. This method gives a clean, finished look and is often used when there is no obstruction in the way.
There are a few pros and cons to both methods. Coping can be a little more challenging than mitering but results in a more robust corner. Mitering is easier to do but can be less sturdy than coping.
Q. Do You Need To Cope Quarter Round?
A. A quarter round is a decorative piece covering the edge of a floor or wall where it meets another surface. It can be used to make a joint less noticeable or to add a bit of flair.
If you have hardwood floors, it’s generally recommended to use quarter round, as this will help protect the edges from wear and tear.
If you have tile or linoleum floors, the quarter round may not be necessary, as these materials are more durable.
Q. What Nails Are Used To Install Quarter-Round Molding?
A. Quarter-round molding is a Trim type often used to cover the gaps between wall and floor surfaces. It can be installed using nails, screws, or adhesive.
Nails are typically used to install quarter-round molding, driven into the molding itself rather than into the surface to which it is attached.
This allows the molding to move freely and prevents it from splitting or cracking.
Q. Can You Glue The Quarter Round In Place?
No, you can’t. Glue won’t hold the quarter round in place. You need nails or screws to hold it in place.
Conclusion
Using a miter saw to cut quarter round is a quick and easy way to get the job done. You must always use the right blade for your cutting material and take time to ensure a clean, precise cut.
Taking all necessary safety precautions when using any power tools would be best. With a bit of practice, you’ll be able to cut the perfect quarter-round every time.
You May Also Be Interested to Read:
1. How to Change the Blade on a Miter Saw: 4 Quick Steps Guide (2021)
2. How to Unlock a Miter Saw – Hands-on Step by Step Guide
3. How to Cut Baseboard Inside-Outside Corners with Miter Saw (2021)
4. How to Cut Laminate Flooring Lengthwise with a Miter Saw – Hands-on Guide
To Learn More About Woodworking and Carpentry Visit at iSaw Guide Home.
Table of Contents