Are there any other tools for cutting 2×4 apart from a circular saw? Yes. There is a variety of them; jigsaw, handsaw and you can also use a table saw on a table saw workstation. But why are we using a circular saw?
Most of these tools are not powerful enough to give a fast cut. Since they are slow in their operation, that is why most people opt to use a circular saw. Science has given rise to many innovations that make our tasks more straightforward. Thank inventors. Come to think of it.
A circular saw is one tool fit to be called an invention. This tool can cut 2×4 lumber effortlessly. It must be potent. Although it is very noisy, it cuts swiftly and effectively. Therefore consider getting the best circular saw if you have a 2×4 wood cutting project coming up.

Making use of such a potent tool comes with some disadvantages also. A small mistake will lead to the destruction of the entire project. If you are not aware of how to rip a 2×4 with a circular saw, there is a very high probability that you will a mistake at some point. Read till the end to know how to use a circular saw in cutting a 2×4.
Required Tools For How To Cut a 2X4 With a Circular Saw

The project is cutting a 2×4; you will need some tools to help you complete this project. These tools work hand in hand to give you amazing results.
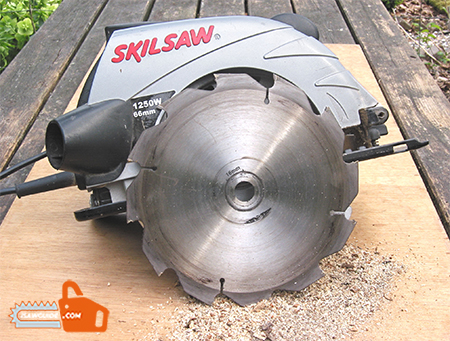
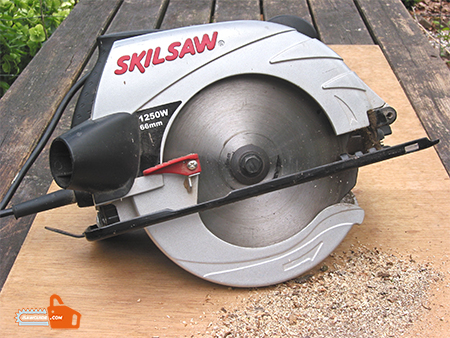
- A circular saw: I mean, you want to know how to cut 2×4 with a circular saw. Therefore, you are going to need one.
- Circular saw blade: It is impossible to use a saw without its blade. It is advisable to get a blade with a coating. The coating ensures that the circular saw blade resists the friction necessary to give a smooth cut.
- Circular saw blade sharpener: You will need this if you feel like your blade is blunt.
- Hold down clamp: This will facilitate holding of the project piece at a perfect position
- A Teflon sheet: This is useful because it is where your project piece lays down.
- Sawhorse
With those tools, you are good to go. But before that there is something very crucial;
Safety Equipment Needed
If you think of starting a woodwork business, a circular saw is an essential tool you require. This tool requires a lot of careful handling since it can be hazardous. This is because it is very noisy and has a sharp blade. The safety equipment necessary include;
- Goggles: Secure your eyes from debris.
- Earmuffs: Protect you from hearing the noisy circular saw. The noise is not suitable for your eardrums.
- Respirator mask: It will prevent inhalation of sawdust.
- Woodwork gloves: They secure fingers and hands from being injured by the sharp blade.
Loose-fitting and polyester wear are not recommended
Step 1: Inspect The Circular Saw And The Blade
After assembling the tools and the safety equipment, you are ready to begin with the first step, which is checking your circular saw and blade to see if they are functional enough. What do you think will happen when you use a non-functional or damaged saw and blade?
The outcome will be disappointing. You will end up messing with the entire wood. Therefore it is vital to examine different parts of your circular saw to see their functionality. This examination will help you use a more operational tool.
There are some of the most critical parts that you should check in your circular saw. However, it doesn’t mean that other parts are not important. Every part is important, but there are some that, if damaged, the circular saw won’t operate at all.
Others carry less impact when not functional. The saw can still run without them. You can get a lot of circular saw guides on how to fix damaged parts of your saw. Are you wondering which crucial parts you should check?
Well, before anything else, you should examine the lower blade guard. To determine whether these parts are okay, you have to observe their movement keenly. It snaps back into its position immediately as you let it go and pulls back with no hitches.
If you see this, it means that the lower blade guard is perfect. If no such observations are made, you should start thinking about replacing them. If it is in perfect condition, you are ready to move to the next part of the circular saw.
Hello there, it’s time to inspect the power source. Remember that a circular saw can’t operate without power. For the cordless circular saw users, check the level of the battery charge. It will be disappointing if the charge dies in the midway of the project.
Therefore ensure that the battery is fully charged. Finally, examine the teeth of the saw blade. Search for any chips and ensure that there are no cracks also. Sharpen the blade if necessary. The beginning will define the end, so be keen on this step.
Step 2: Set The Blade
At this step, I hope that all your circular saw parts are in good shape, and that you are ready to continue with your project. Setting the blade simply means putting in the blade depth. This will determine the circular saw cut depth.
Assumptions can be made that it is possible to set the blade depth as you want it to be. That is a very wrong assumption. Chances that you can put in the blade to the exact extent that you wish to are very minimal.
Do you know what happens when the blade depth is more significant than what you require? What can happen is not positive at all. A blade that is deeper than what you need leads to various safety problems. A deeper circular saw blade can lead to your circular saw sticking when cutting.
This can bring about the saw kicking back. Remember, you are here to complete a project swiftly and with no hitches. Therefore follow the steps keenly. Don’t underestimate any point if you want perfect outcomes.
Also, the deeper the saw blade, the more it is exposed. Can you guess where my point is driving? Well, the lesser the exposure, the better the situation. Aim at getting the least exposure of the blade as much as possible. This will guarantee a smooth and straight cut.
With that knowledge about the depth of the blade, you are ready to set the actual depth now. How is the project so far? I guess you are eager to learn more about this depth we have been talking about.
I bet someone is wondering how to choose the most accurate circular saw blade. If you are one of them, let me show you how to do so. Unplug your circular saw and pull back the saw blade guard.
After that, now grasp it against your 2×4 wood. Regulate the depth of the saw blade. Do this until it’s almost a quarter way of an inch underneath the base of your 2×4. It should not be more than ½ inch beneath.
Step 3: Support The Wood
Do you remember the hold-down clamp? Maybe you thought that we are never going to use them. Now, this step is evidence that it is an essential tool in this project. I hope you were very keen when reading the tools list. I said, ‘hold down clamp.’
Very correct. You only need one hold-down clamp. If you are a first-time circular saw user, you are likely to make a mistake at this step. But I am here to make sure that you don’t make any mistake
Many newcomers or first-time circular saw users hold their wood on the two sides. This is a very terrible mistake. The single hold-down clamp is supposed to support your wood only on one side. You are a beginner, but you can do it like a pro.
Therefore don’t blander by supporting both sides. If you hold your 2×4 wood on two sides and begin ripping off, you just took yourself into trouble. Just before finishing the cut, you will see the hold-down clamp falling downward slowly.
I know you just imagine what will happen next. Well, if you hold the wood on both sides, your imagination will be a reality. Therefore take caution about that. As you see the clamp falling slowly, this will lead to another even happening.
Your circular saw will be resisting, and at the same time, it is cutting. These will make you have trouble handling it. In short, the saw will overpower you. Therefore, in order to avoid all these, hold your wood on a single side. This will help you gain control over the circular saw.
Again how do you then maintain this position? Resting your 2×4 wood on a sawhorse is a perfect way. The portion that you intend on ripping off should be hanging over the sawhorse freely without forcing it. The other portion must be tightly secured in order to provide the best cut.
The clamps can be useful here. Alternatively, you can suspend your 2×4 lumber on a circular saw table in case you don’t have a sawhorse. Make sure that nothing is under the table.
Step 4: Cut Straight

After supporting the wood, you are set for the final step. This is now the step where the practical cutting of a 2×4 lumber with a circular saw occurs. Before heading to the cutting, you need to mark your wood.
Mark your 2×4 lumber using a scale and a pencil. This is essential as it will guide you on how to make a straight cut. Are you yearning for a straight cut? Then you should make a very straight mark, just as you want the results to be.
We are all human beings, whether beginners or pros, in cutting a 2×4 with a circular saw. It is normal to swing away from the mark at times. If you swing away from the mark slightly, not even too much, your perfect straight cut is ruined.
Turning away from the mark can be brought about by shaky hands or even vibration from the circular saw. As much as you want a straight cut, attempting to bring the saw back to the mark while the saw blade is still operating is not the best idea.
Veering away may also be caused by the 2×4 wood thickness integrates with high cutting speed. On the other hand, there are still techniques that you can employ to ensure that you get a straight cut. The first thing to do if the saw blade starts swinging away is stop cutting immediately.
Turn off the saw and wait until the blade stops rotating. Pull out the saw from the wrong cut and reset it to the correct direction. After that, you can start the circular saw again and start cutting. Repeat the same procedure if the condition occurs still until you are done.
Another technique is using speed square equipment. Combining a protractor and miter square enables you to mark a straight line on your 2×4 wood. These tools can also be beneficial when cross-cutting.
Grasp the speed square against the margin of the 2×4 wood; this makes a straight line. Then direct the saw against the square to get a straight cut. And that is how to make straight cuts using a circular saw.
Conclusion
Ripping with a circular saw is the best experience you will ever have among all your woodwork projects. A Circular saw is one of the most potent cutting machines. It may be a bit complicated to use for the first time, but when you get the circular saw basics, you can do any woodwork project using it. It makes you do your work efficiently and fast.
It may be a bit complicated to use for the first time, but when you get the circular saw basics, you can do any woodwork project using it. It makes you do your work efficiently and fast.
Following the step-by-step procedure of how to cut 2×4 with a circular saw makes you upgrade from being a beginner to being a pro. How is the sound of that? Amazing, right? But remember, more practice will make you the best.
Therefore engage in doing more 2×4 cuts, and sometimes you can also teach others. If you do it for business, your clients will be the happiest as they see you make straight and accurate cuts using a circular saw. It will make you feel like a star.
Table of Contents